从零搭建我的个人博客:Hexo + Cloudflare 全记录
花了两天时间,我从零搭建了自己的个人博客 wjqblog.cn。总成本 38 元(域名两年),其余全部免费。这篇文章记录从安装环境到正式上线的完整过程,给想搭博客的朋友一份能照着走的路线图。
相关网址一览
| 用途 | 地址 |
|---|---|
| 我的博客主页 | https://wjqblog.cn |
| 文章列表 | https://wjqblog.cn/blog/ |
| 文章归档 | https://wjqblog.cn/archives/ |
| RSS 订阅引导页 | https://wjqblog.cn/subscribe/ |
| RSS 订阅地址 | https://wjqblog.cn/atom.xml |
| 源码仓库(GitHub) | https://github.com/WJQ-malao/blog |
| 我的 Gitee | https://gitee.com/wujiang-j |
| Cloudflare 控制台 | https://dash.cloudflare.com |
| 腾讯云域名注册(购买) | https://dnspod.cloud.tencent.com |
| 腾讯云域名管理(控制台) | https://console.cloud.tencent.com/domain |
| Hexo 官方文档 | https://hexo.io/zh-cn/docs/ |
最终架构
1 | 本地写 Markdown → git push → GitHub 仓库 |
以后每次写完文章,只需 git push,一分钟后网站自动更新。
第一步:准备环境
- 安装 Node.js(LTS 版)和 Git,官网下载一路默认安装
- 注册 GitHub 账号和 Cloudflare 账号(可用 GitHub 登录)
第二步:本地搭建 Hexo
1 | npx hexo-cli init blog # 初始化项目 |
在 _config.yml 里把语言改成 zh-CN、时区改成 Asia/Shanghai。
写文章用 npx hexo new "标题",会在 source/_posts/ 生成 Markdown 文件。
第三步:推送到 GitHub
在 GitHub 新建一个空仓库(不勾选 README),然后:
1 | git init -b main |
第四步:部署到 Cloudflare Workers
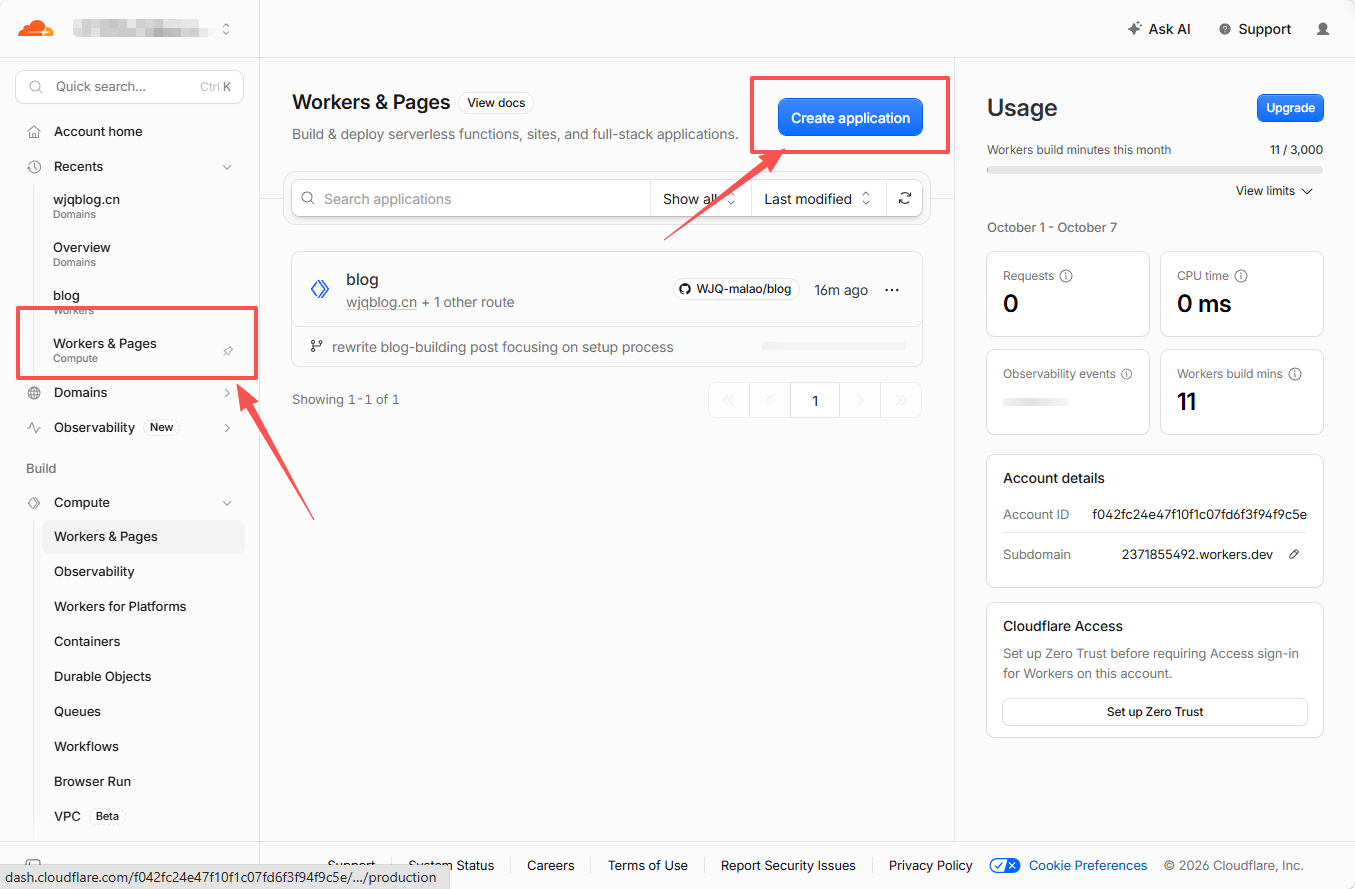
- Cloudflare → Workers & Pages → Create application,关联 GitHub 仓库
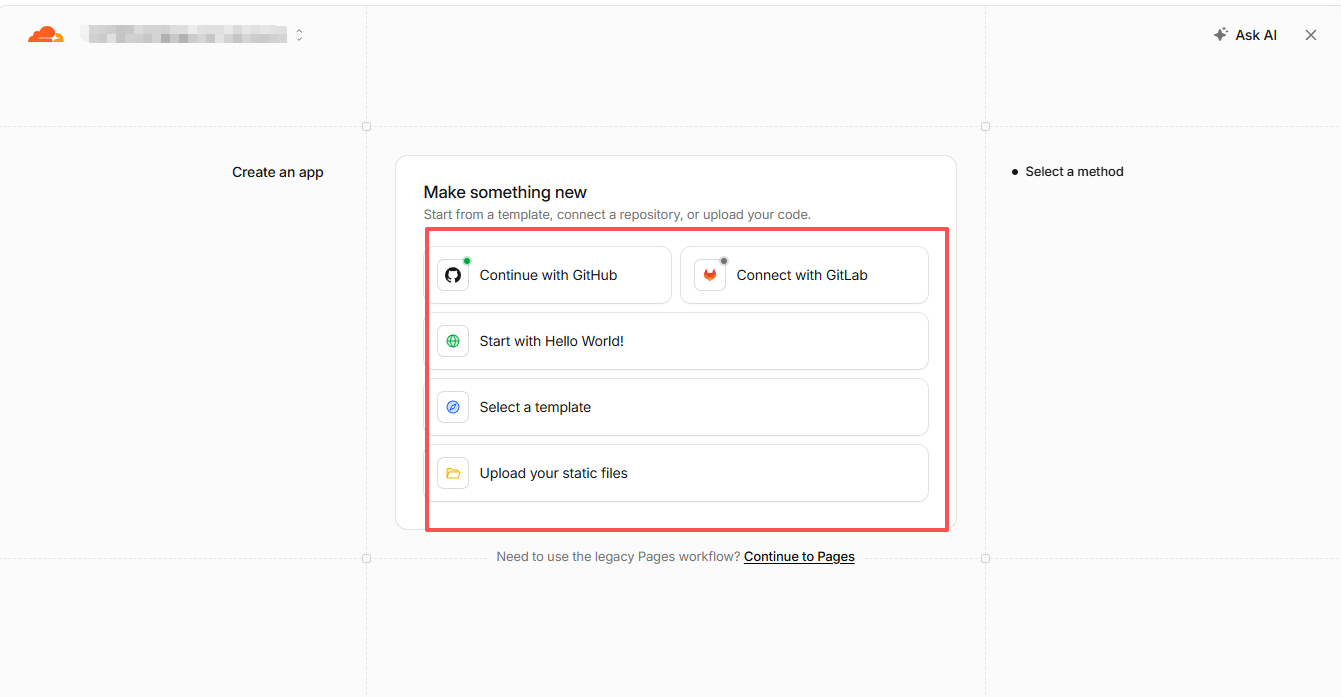
- 选择 Continue with GitHub,授权后选中你的博客仓库
- 构建配置:
- Build command:
npm run build(Hexo 自带"build": "hexo generate") - Deploy command:
npx wrangler deploy
- Build command:
- 仓库里添加
wrangler.jsonc,声明静态文件目录:
1 | { |
push 之后 Cloudflare 自动构建部署,博客就上线了。
第五步:踩坑——免费域名国内无法访问
部署很顺利,但访问时问题来了:
- Cloudflare 的免费域名
*.workers.dev:国内被 DNS 污染,直接打不开 - 改用腾讯云 EdgeOne Pages:国内能开,但它的免费域名只有 3 小时预览有效期,过期返回 401
结论:免费平台 + 免费域名的组合在国内无法长期使用,想让博客稳定公开访问,必须有自己的域名。
第六步:买域名并绑定(关键一步)
注意:买域名 ≠ 买服务器,静态博客托管在免费平台上,永远不需要服务器。
6.1 腾讯云购买域名
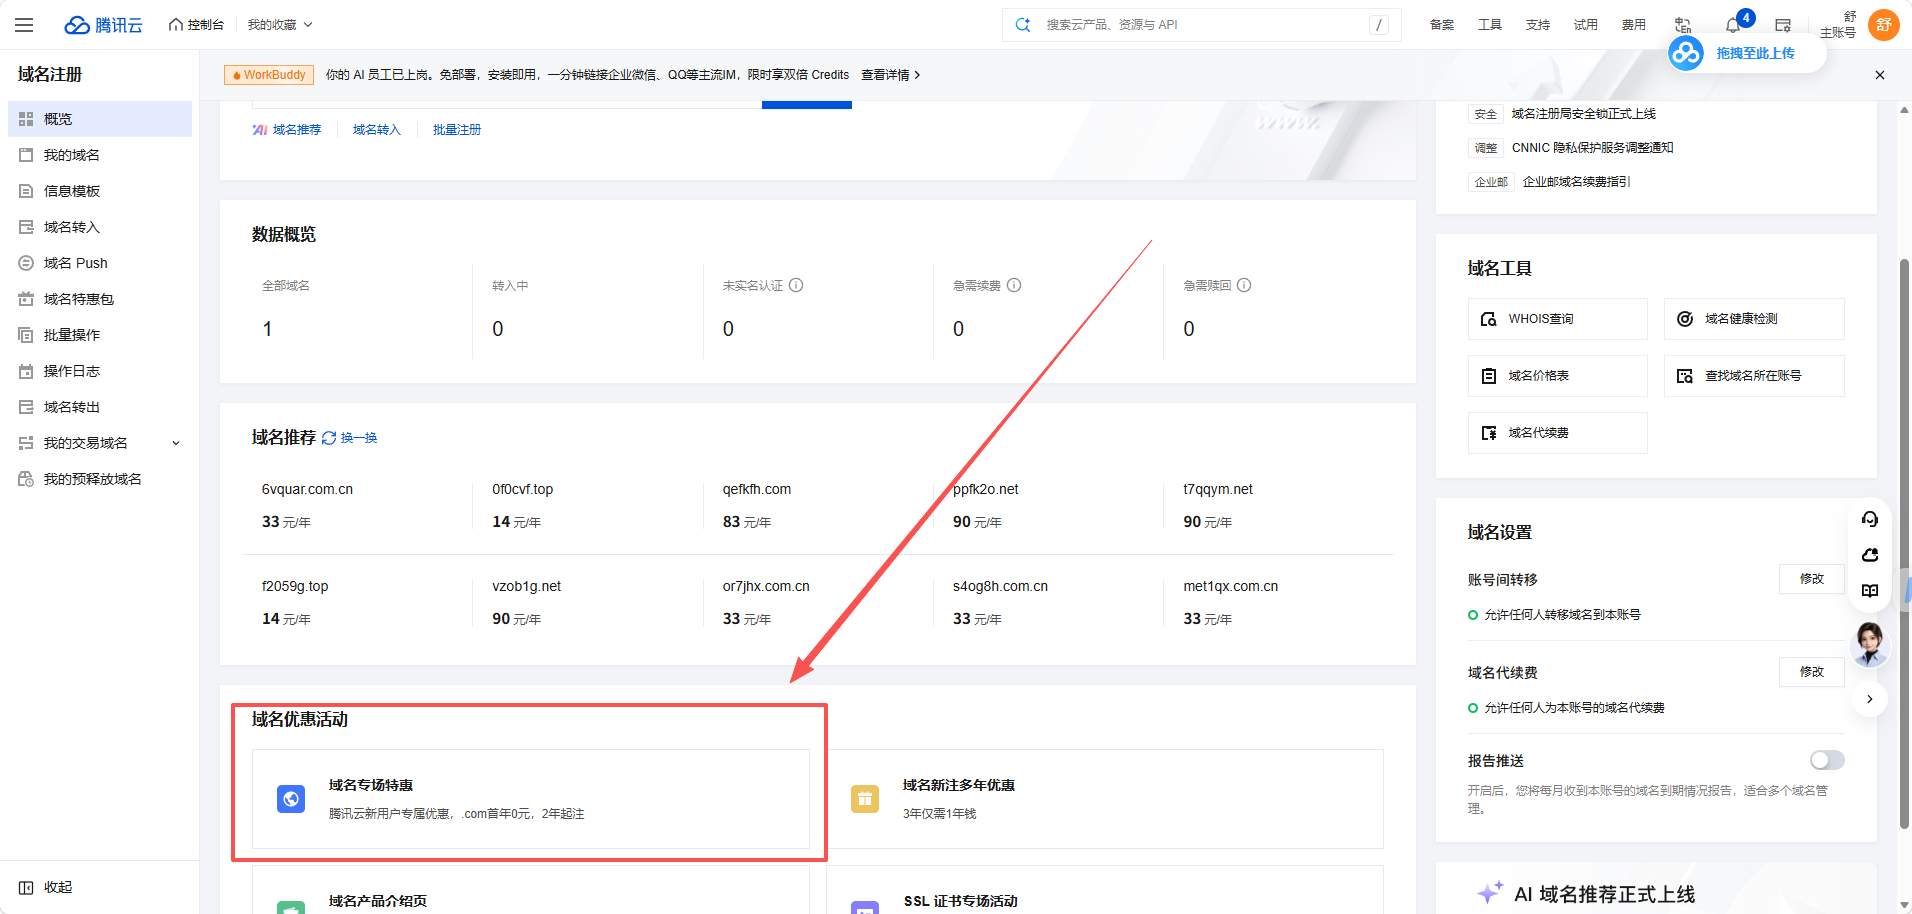
- 打开腾讯云域名注册控制台,在搜索框输入想要的名字(如
wjqblog),逐个后缀查看是否可注册
- 选好后缀(
.cn两年 38 元;.com更通用但贵一些),点击立即购买 - 信息模板:首次购买需要创建,填真实姓名、身份证、邮箱(就是域名实名认证,审核几分钟)
- “搭配购买”的产品全部不勾——都用不上
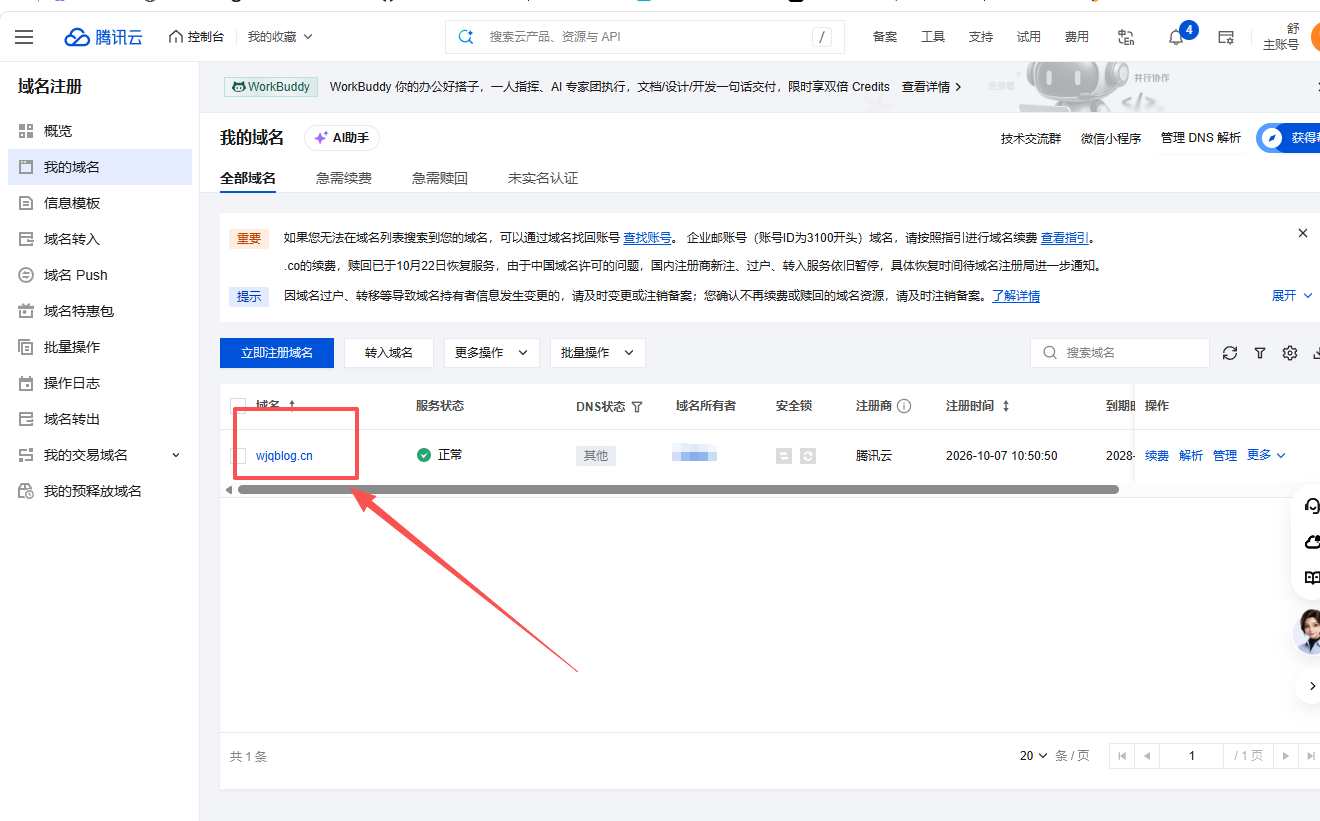
- 支付后等实名审核通过,在”我的域名”里看到状态为”正常”即可
6.2 接入 Cloudflare
- Cloudflare → Domains → Add domain → Connect a domain(不要选 Transfer/Buy)
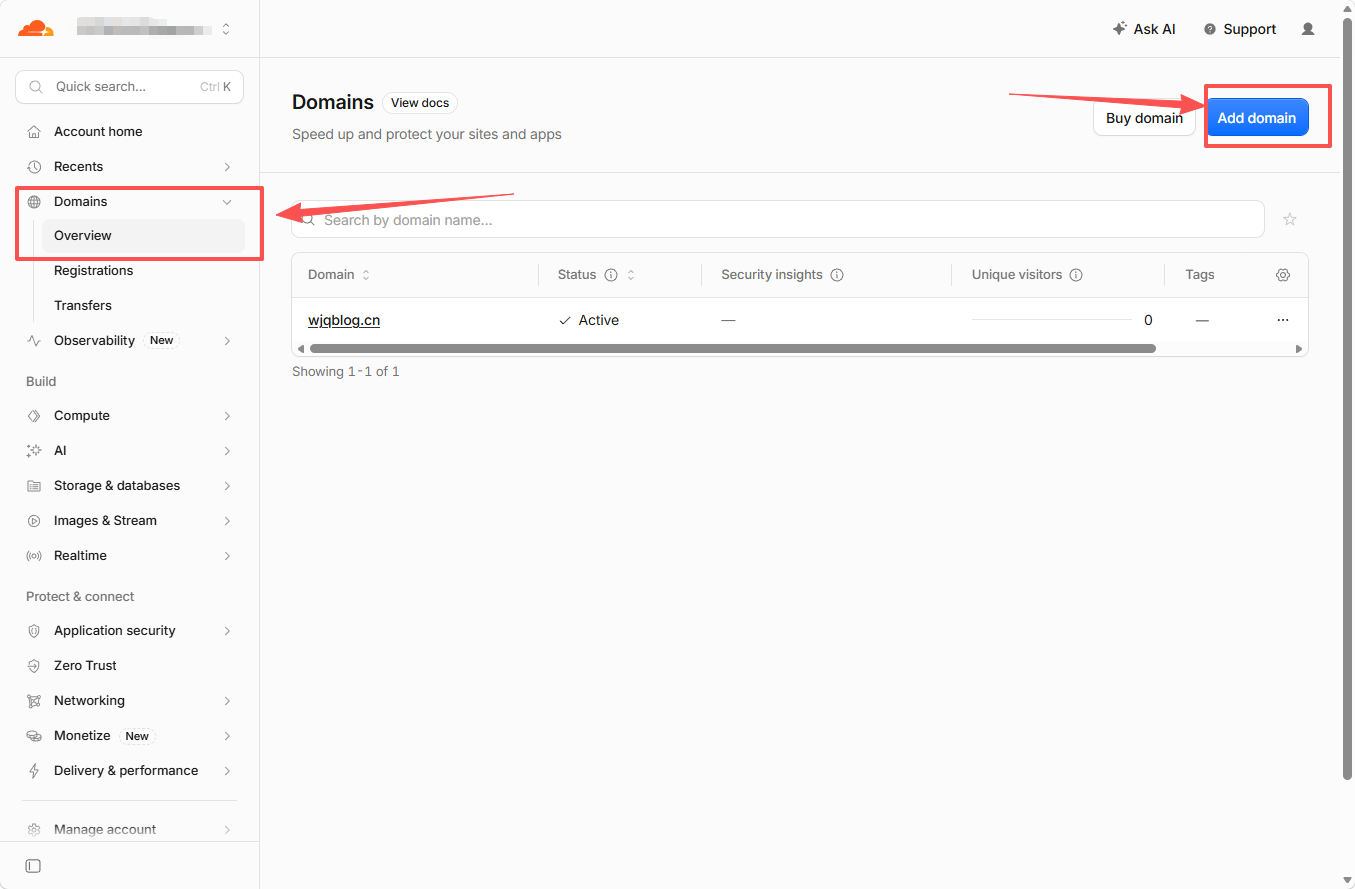
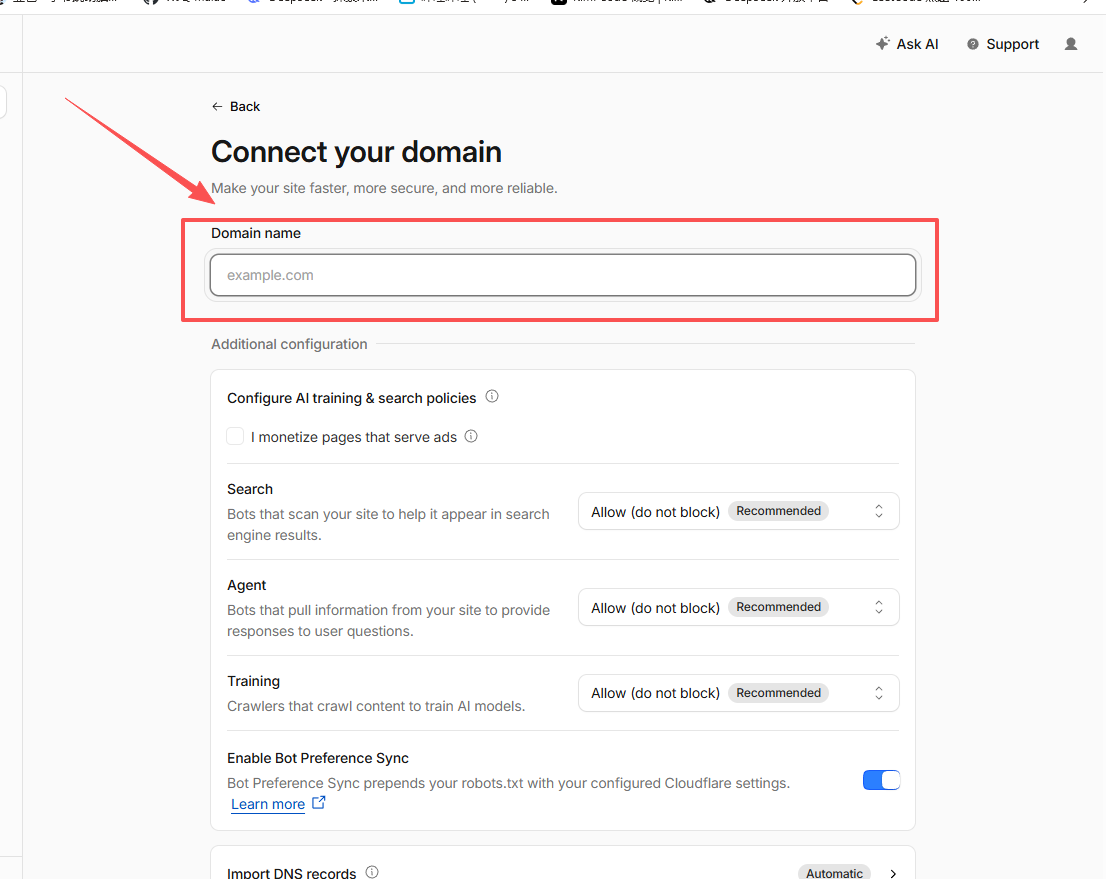
- 输入域名(只填
wjqblog.cn,不要加http://或www),其余选项保持默认,点 Continue
- DNS 记录页面什么都不用加,直接点 Continue to activation,弹窗选 Confirm
- 激活页面会给出两个 Cloudflare 名称服务器(形如
xxx.ns.cloudflare.com),复制下来
6.3 腾讯云修改 DNS 服务器
- 腾讯云 → 域名注册 → 我的域名 → 点域名 → 管理
- 找到 DNS 服务器 → 修改 → 选”使用非腾讯云 DNS”
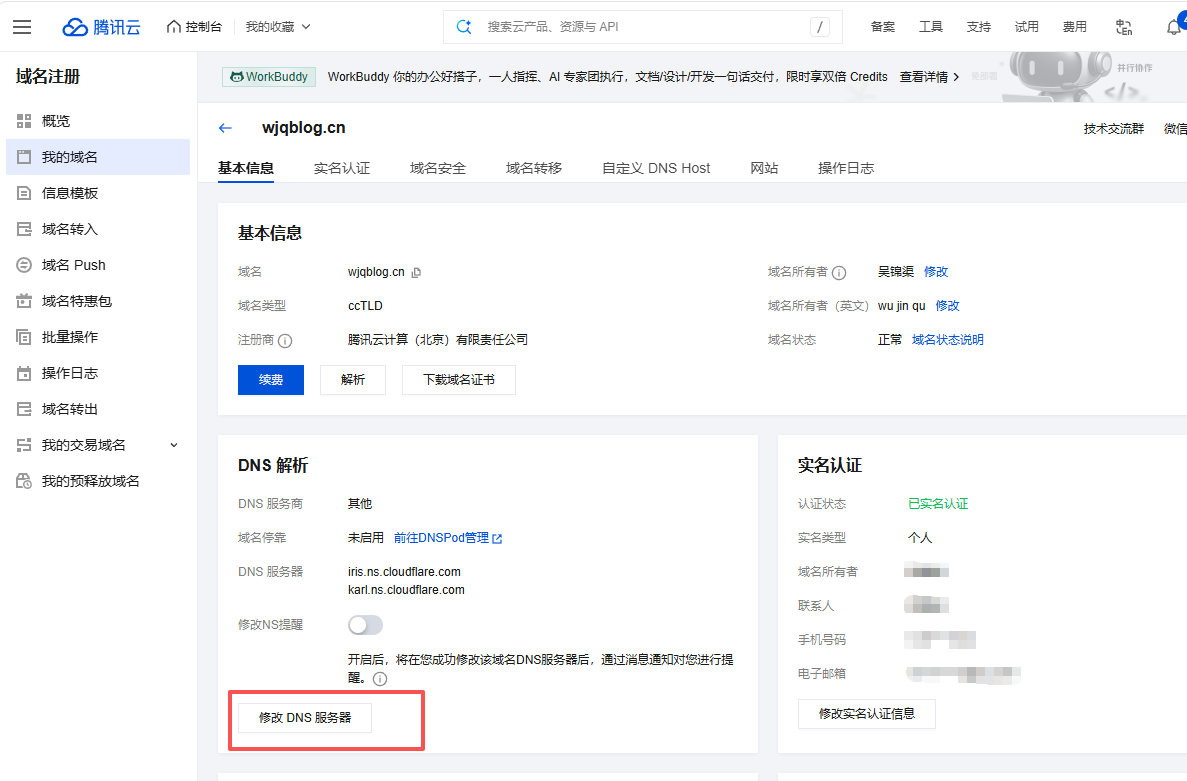
- 把默认的两个 dnspod 地址替换成 Cloudflare 给的两个(两个都要换,一主一备)→ 提交
- 回 Cloudflare 点 I updated my nameservers,等几分钟检测通过,显示 ✓ Active
改 DNS 服务器就是声明”这个域名归 Cloudflare 管”,这是整个接入的核心操作。
6.4 绑定到 Workers 项目
- Cloudflare → Workers & Pages → 点已有的 blog 项目(不要走 Create 新建流程)
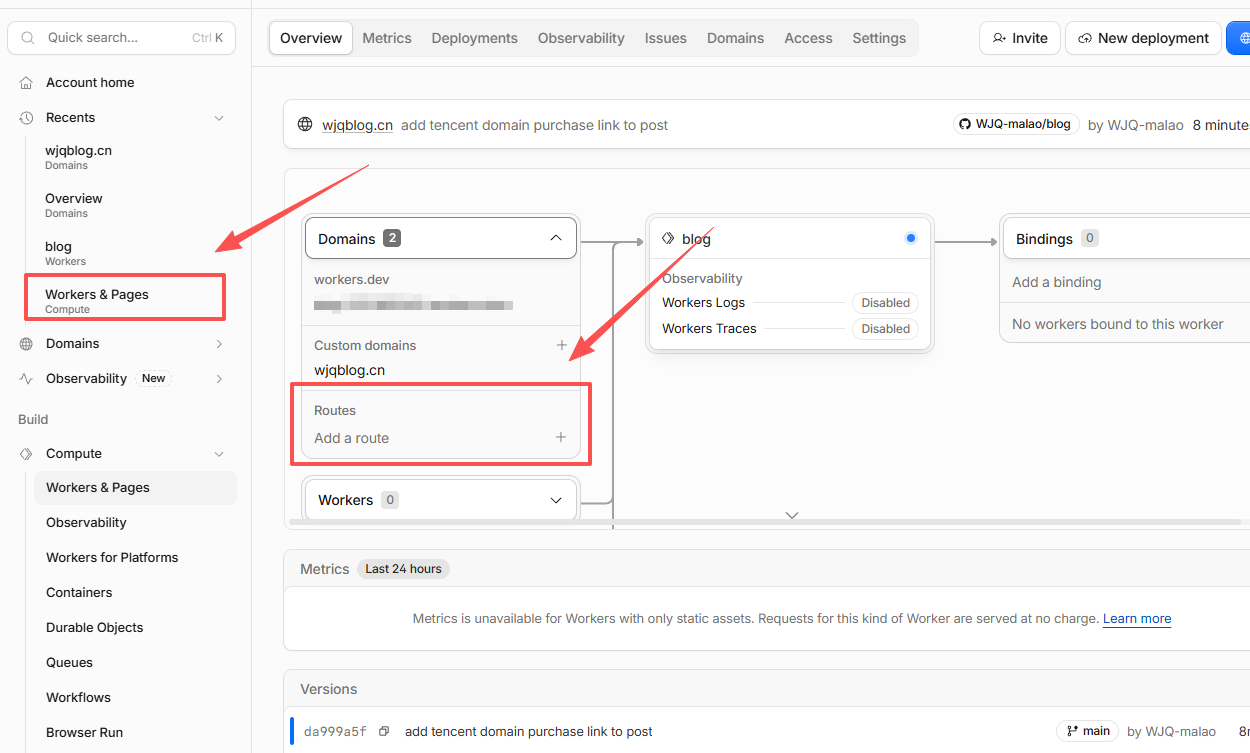
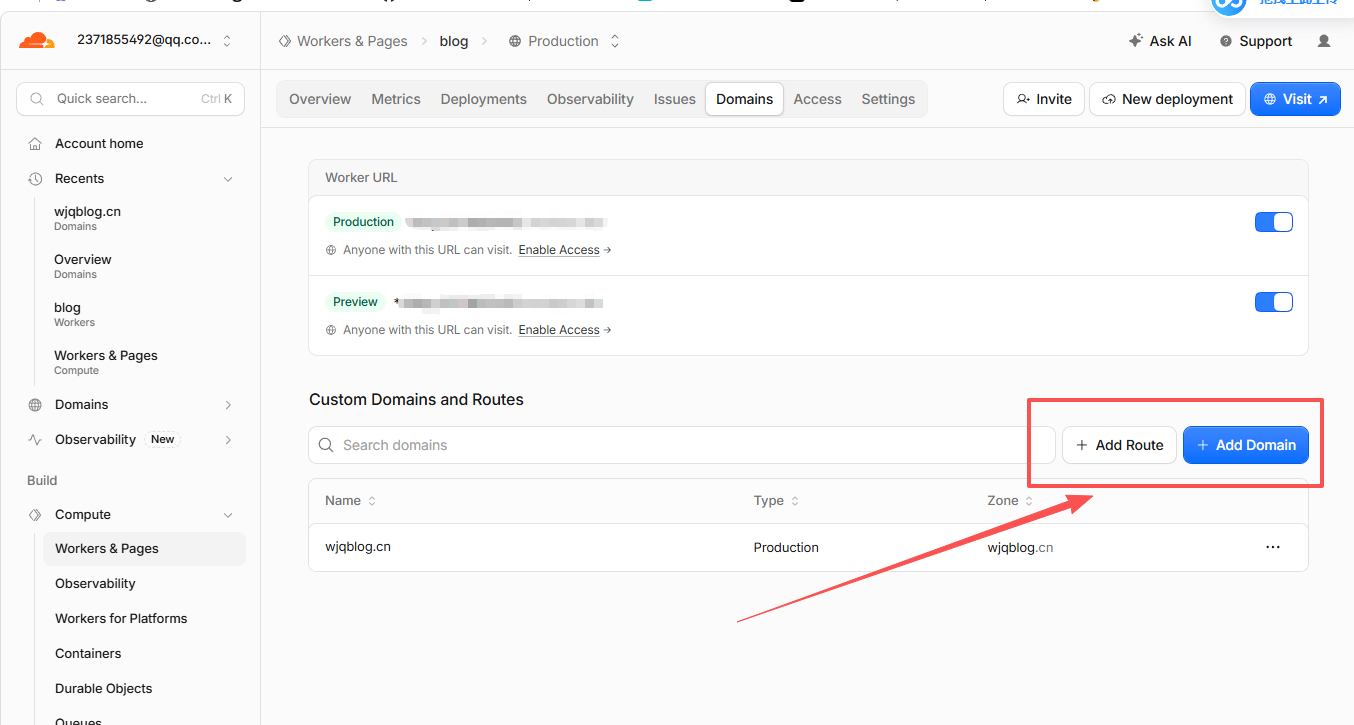
- 顶部 Domains 标签 → Add Domain
- Subdomain 留空(即绑定主域名),Enable for 保持 Production → 点 Add domain
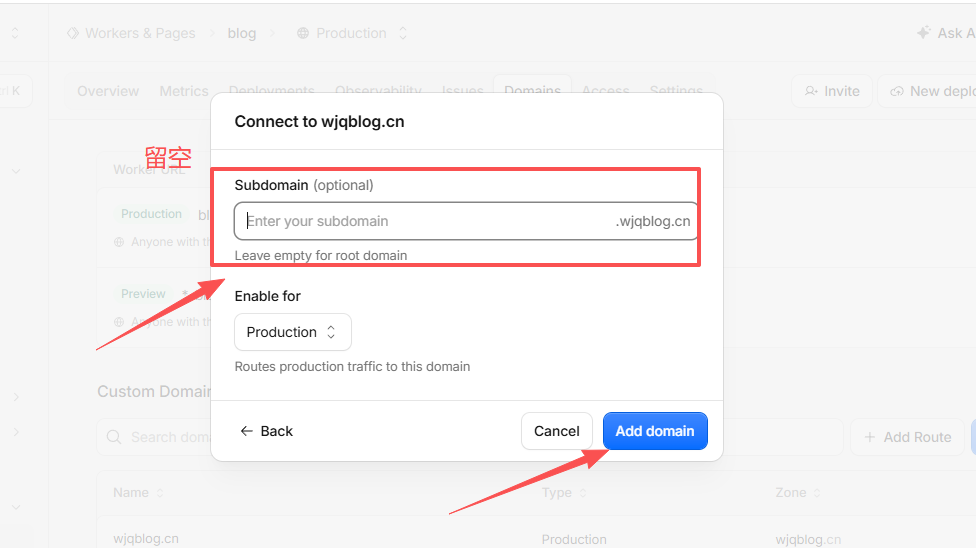
HTTPS 证书由 Cloudflare 自动签发,不需要配置任何密钥。
最后把 _config.yml 里的 url: 改成 https://wjqblog.cn,push 一次收尾。
日常使用
1 | npx hexo new "文章标题" # 新建文章 |
经验总结
- 免费域名在国内都不靠谱:workers.dev 被墙、EdgeOne 限 3 小时,一个便宜域名(约 20 元/年)是最小成本
- 域名安全 = 账号安全:没有密钥要管,保护好腾讯云和 Cloudflare 的账号密码即可
- 改 DNS 服务器是域名接入的核心操作,作用就是声明”这个域名归 Cloudflare 管”
- 一切配置都在 Git 仓库里,改坏了
git revert回滚,换电脑git clone复活
如果你也想搭一个,照这个流程走一遍,半天就能上线。踩坑欢迎留言交流。